NetYea 網頁設計 發表在 痞客邦 留言(0) 人氣()
NetYea 網頁設計 發表在 痞客邦 留言(0) 人氣()
NetYea 網頁設計 發表在 痞客邦 留言(0) 人氣()
NetYea 網頁設計 發表在 痞客邦 留言(0) 人氣()
下載安裝請看此篇
本篇文在說明如何讓 Arduino IDE 可以使用 ESP32 開發板。
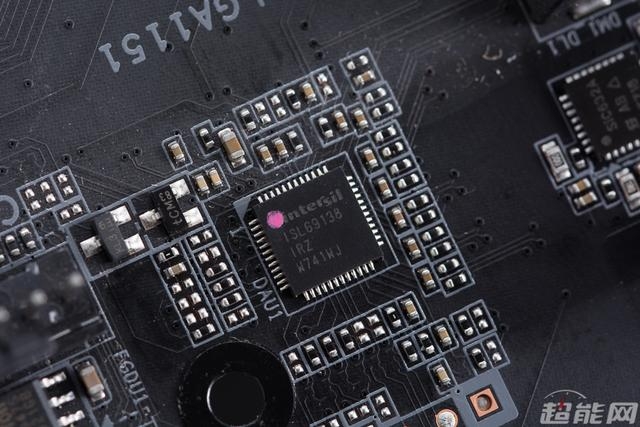
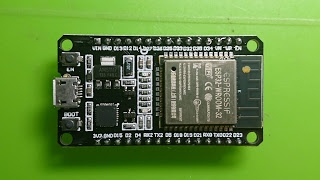
我手上目前的這兩塊 ESP32 開發板,都同時具有 WiFi 和藍芽功能,個人覺得大塊的這片(ESP32 Wemos D1) 比較好用,因為它可以適用 Arduino UNO 擴展板。


|
NetYea 網頁設計 發表在 痞客邦 留言(0) 人氣()
NetYea 網頁設計 發表在 痞客邦 留言(0) 人氣()
上傳測試HelloWorld:
環境設定完成後,就可以來寫程式測試,這裡就先用HelloWorld先做個簡單練習。
NetYea 網頁設計 發表在 痞客邦 留言(0) 人氣()
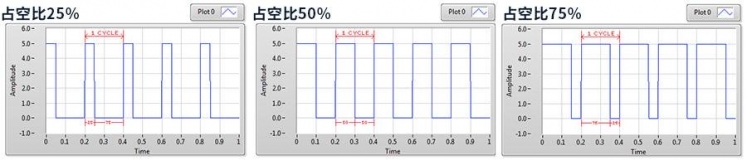
用ESP32 PWM實現LED慢慢亮起。
程式的部份主要分成三個:1.設定頻道LEDchannel、2.附加到PIN腳、3.決定輸出大小。
1.設定頻道LEDchannel屬性
ledcSetup(LEDChannel, freq, resolution);
//LEDChannel設定為0,不同輸出要設定到不同頻道,例如RGB LED就要開三個頻道分別管理R、G、B
//freq輸出頻率,建議值5000 Hz
//resolution代表輸出解析度,例如8代表0-255,10代表0-1023
2.附加到PIN腳
ledcAttachPin(ledPin, LEDChannel);
//ledPin代表腳位,看你把設備接在哪個腳位上面
//LEDchannel代表步驟1所宣告的LEDchannel,也就是說把設定好的LEDchannel屬性附加到某個腳位上
3.決定輸出大小。
ledcWrite(LEDChannel, dutyCycle);
//將LEDchannel輸出dutyCycle的值。
範例程式將使接在Pin16的LED逐漸亮起並熄滅,範例複製於 https://randomnerdtutorials.com/esp32-pwm-arduino-ide/


- // the number of the LED pin
- const int ledPin = 16; // 16 corresponds to GPIO16
-
- // setting PWM properties
- const int freq = 5000;
- const int ledChannel = 0;
- const int resolution = 8;
-
- void setup(){
- // configure LED PWM functionalitites
- ledcSetup(ledChannel, freq, resolution);
-
- // attach the channel to the GPIO to be controlled
- ledcAttachPin(ledPin, ledChannel);
- }
-
- void loop(){
- // increase the LED brightness
- for(int dutyCycle = 0; dutyCycle <= 255; dutyCycle++){
- // changing the LED brightness with PWM
- ledcWrite(ledChannel, dutyCycle);
- delay(15);
- }
-
- // decrease the LED brightness
- for(int dutyCycle = 255; dutyCycle >= 0; dutyCycle--){
- // changing the LED brightness with PWM
- ledcWrite(ledChannel, dutyCycle);
- delay(15);
- }
- }
NetYea 網頁設計 發表在 痞客邦 留言(0) 人氣()
NetYea 網頁設計 發表在 痞客邦 留言(0) 人氣()
RGB LED依序為紅、最長腳、藍、綠
RGB LED的共陽極(最長腳)串接一個330的電阻後再接地(GND)。

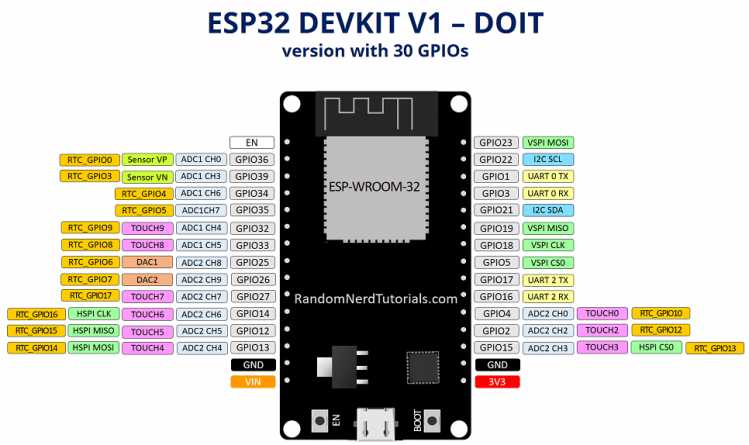
RGB LED的R接Arduino GPIO腳位16。
RGB LED的G接Arduino GPIO腳位17。
RGB LED的B接Arduino GPIO腳位5。
程式碼
1.每隔一秒改變LED的顏色,紅、綠、藍、黃、青、洋紅、白
NetYea 網頁設計 發表在 痞客邦 留言(0) 人氣()