在GOOGLE搜尋欄輸入,關鍵字會出現四個版位
自然排序會有兩塊 精選摘要、排名位

1.Google 關鍵字廣告位
NetYea 網頁設計 發表在 痞客邦 留言(0) 人氣()
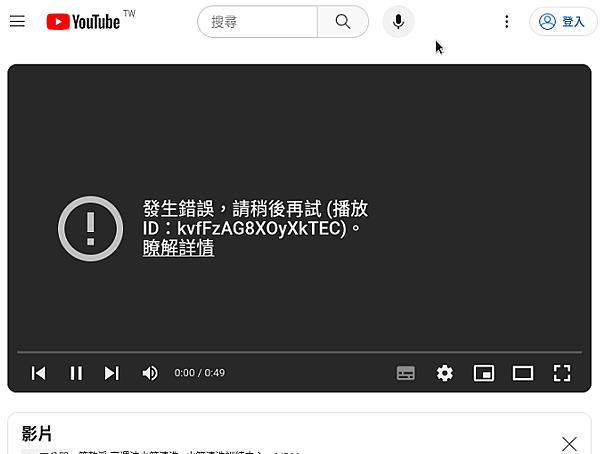
CentOS 8 的 firefox 無法播放youtube影片錯誤如下

需安裝 ffmpeg
首先
NetYea 網頁設計 發表在 痞客邦 留言(0) 人氣()
下載檔案安裝
1. 先到NVIDIA下載驅動程式NVIDIA-Linux-x86_64-470.239.06.run


NetYea 網頁設計 發表在 痞客邦 留言(0) 人氣()
1. 到Anaconda3官網下載
找到並執行Anaconda3-2024.02-1-Linux-x86_64.sh


NetYea 網頁設計 發表在 痞客邦 留言(0) 人氣()
這篇文章將解釋如何在 RHEL 8 或 CentOS 8 上安裝和設定 Samba。您還將了解如何使用 samba 將 RHEL 8 或 CentOS 8 系統中的資料夾共用到 Windows 電腦。
Windows 和 Linux 系統的結構不同,兩者之間的和平共處往往是個挑戰。感謝 Samba,兩個系統現在可以透過網路共享檔案和資料夾。那什麼是森巴舞呢? Samba 是一種免費的開源協議,允許以簡單、無縫的方式在兩個系統之間共用檔案。您可以在 Linux 伺服器上擁有一個 Samba 伺服器,託管 Windows 用戶端可以存取的各種檔案和資料夾。
NetYea 網頁設計 發表在 痞客邦 留言(0) 人氣()
AnyDesk 是 Linux 用戶可用的最佳專有遠端桌面應用程式之一。該軟體程式提供對運行 Windows、macOS、Linux 和 FreeBSD 的電腦的流暢、無縫的遠端存取。在本指南中,我們將解釋如何在 CentOS 8 / RHEL 8 Linux 桌面中安裝 AnyDesk。
在 CentOS 8 / RHEL 8 上安裝 AnyDesk 後,您將能夠從 Windows、Mac 和其他基於 Linux 的系統存取 Linux 系統。您將享受其簡單且用戶友好的設定和管理工具,使您能夠輕鬆管理遠端系統。
在 CentOS 8 / RHEL 8 上安裝 AnyDesk
我們將使用預先打包的 RPM 軟體包從 AnyDesk Yum 儲存庫在 CentOS 8 / RHEL 8 上安裝 Install AnyDesk。您可以手動下載 RPM 軟體包並安裝它,但這意味著必須手動完成更新。
1 – 新增 AnyDesk 儲存庫
使用下面共享的命令將儲存庫新增至您的系統。
CentOS 8:
- tee /etc/yum.repos.d/AnyDesk-CentOS.repo <<EOF
- [anydesk]
- name=AnyDesk CentOS - stable
- baseurl=http://rpm.anydesk.com/centos/\$basearch/
- gpgcheck=1
- repo_gpgcheck=1
- gpgkey=https://keys.anydesk.com/repos/RPM-GPG-KEY
- EOF
NetYea 網頁設計 發表在 痞客邦 留言(0) 人氣()
安裝顯示卡 NVIDIA驅動時
出現錯誤

NetYea 網頁設計 發表在 痞客邦 留言(0) 人氣()
14TB的硬碟,檔案都存在資源回收桶
Linux下的復原站其實是一個資料夾,該資料夾下邊有兩個資料夾:files和info
在終端機執行
- rm -rf /root/.local/share/Trash/files
NetYea 網頁設計 發表在 痞客邦 留言(0) 人氣()
- #檢查是否安裝lm_sensors
- rpm -qa|grep lm_sensors
-
- #安裝
- yum install *lm_sensors*
-
- #配置lm_sensors 所有提示均輸入yes
- sensors-detect
-
- #使用lm_sensors
- sensors #查温度
- watch -n 1 -d sensors #每秒刷新
-
複製代碼
|
NetYea 網頁設計 發表在 痞客邦 留言(0) 人氣()
1. 備份資料庫及FTP網站資料
2. 到官方下載opencart 3.X
https://www.opencart.com/index.php?route=marketplace/extension/info&extension_id=35919
3. 解壓縮檔案後上傳到FTP
4. 升級
- http://yourdomain/install
NetYea 網頁設計 發表在 痞客邦 留言(0) 人氣()
1. 備份資料庫及網站檔案
2. 首先到官網下載opencart 4.0.2.3
https://www.opencart.com/index.php?route=cms/download/history
3. 解壓縮檔案並上傳
4. 確認平台支援 PHP 8.2+
5. 建立config.php 及 admin/config.php 可寫 只填 DB訊息
- // DB
- define('DB_DRIVER', 'mysqli');
- define('DB_HOSTNAME', 'localhost');
- define('DB_USERNAME', 'xxxx');
- define('DB_PASSWORD', 'xxxx');
- define('DB_DATABASE', 'xxxx');
- define('DB_PORT', '3306');
- define('DB_PREFIX', 'oc_');
NetYea 網頁設計 發表在 痞客邦 留言(0) 人氣()
OpenCart 4.X 新增分類出現錯誤 (靜態網址下)

NetYea 網頁設計 發表在 痞客邦 留言(0) 人氣()
CPanel 新帳號時無法修改PHP版本
出現錯誤
The system failed to create the file “/var/cpanel/userdata/wordnetyea/cache.lock” (as EUID: 1063, EGID: 1066 1066) because of the following error: Permission denied
NetYea 網頁設計 發表在 痞客邦 留言(0) 人氣()
EyeSee 官網:https://eyesee.cht.com.tw/
申請帳號(用HINET線路HN申請)
申請好了之後
1.監測報表->寬頻上網->加值服務管理

NetYea 網頁設計 發表在 痞客邦 留言(0) 人氣()
NetYea套件新增Line@漂浮圖標
在電腦版或是手機板都能讓客戶更容易找到你
NetYea 網頁設計 發表在 痞客邦 留言(0) 人氣()
1. 到 Github 下載 tesseract-ocr-w64-setup-5.3.3.20231005.exe 來安裝Tesseract。
2. 記錄Tesseract安裝的路徑,預設路徑通常為 C:\Program Files\Tesseract-OCR。
3. 將Tesseract.exe路徑新增到環境變數中
NetYea 網頁設計 發表在 痞客邦 留言(0) 人氣()
Python中執行Pytesseract模組錯誤 - 錯誤訊息
- raise TesseractNotFoundError()
- pytesseract.pytesseract.TesseractNotFoundError: tesseract is not installed or it's not in your PATH. See README file for more information.
NetYea 網頁設計 發表在 痞客邦 留言(0) 人氣()
在測試 mnist 數字辨識時
代碼來源
https://hackmd.io/@Maxlight/SkuYB0w6_#3-hyperparameter
- import torch
- from torch.utils import data as data_
- import torch.nn as nn
- from torch.autograd import Variable
- import matplotlib.pyplot as plt
- import torchvision
- import os
-
- EPOCH = 1
- BATCH_SIZE = 50
- LR = 0.001
- DOWNLOAD_MNIST = False
-
- train_data = torchvision.datasets.MNIST(root = './mnist',train = True,transform = torchvision.transforms.ToTensor(),download = DOWNLOAD_MNIST)
-
- print(train_data.train_data.size())
- print(train_data.train_labels.size())
- plt.ion()
- for i in range(11):
- plt.imshow(train_data.train_data[i].numpy(), cmap = 'gray')
- plt.title('%i' % train_data.train_labels[i])
- plt.pause(0.5)
- plt.show()
-
- train_loader = data_.DataLoader(dataset = train_data, batch_size = BATCH_SIZE, shuffle = True,num_workers = 2)
-
- test_data = torchvision.datasets.MNIST(root = './mnist/', train = False)
- test_x = torch.unsqueeze(test_data.test_data, dim = 1).type(torch.FloatTensor)[:2000]/255.
- test_y = test_data.test_labels[:2000]
-
- class CNN(nn.Module):
- def __init__(self):
- super(CNN, self).__init__()
- self.conv1 = nn.Sequential(
- nn.Conv2d(in_channels = 1, out_channels = 16, kernel_size = 5, stride = 1, padding = 2,),# stride = 1, padding = (kernel_size-1)/2 = (5-1)/2
- nn.ReLU(),
- nn.MaxPool2d(kernel_size = 2),
- )
- self.conv2 = nn.Sequential(
- nn.Conv2d(16, 32, 5, 1, 2),
- nn.ReLU(),
- nn.MaxPool2d(2)
- )
- self.out = nn.Linear(32*7*7, 10)
-
- def forward(self, x):
- x = self.conv1(x)
- x = self.conv2(x)
- x = x.view(x.size(0), -1)
- output = self.out(x)
- return output, x
-
- cnn = CNN()
- print(cnn)
-
- optimization = torch.optim.Adam(cnn.parameters(), lr = LR)
- loss_func = nn.CrossEntropyLoss()
-
- for epoch in range(EPOCH):
- for step, (batch_x, batch_y) in enumerate(train_loader):
- bx = Variable(batch_x)
- by = Variable(batch_y)
- output = cnn(bx)[0]
- loss = loss_func(output, by)
- optimization.zero_grad()
- loss.backward()
- optimization.step()
-
- if step % 50 == 0:
- test_output, last_layer = cnn(test_x)
- pred_y = torch.max(test_output, 1)[1].data.numpy()
- accuracy = float((pred_y == test_y.data.numpy()).astype(int).sum()) / float(test_y.size(0))
- print('Epoch: ', epoch, '| train loss: %.4f' % loss.data.numpy(), '| test accuracy: %.2f' % accuracy)
-
- test_output, _ = cnn(test_x[:10])
- pred_y = torch.max(test_output, 1)[1].data.numpy()
- print(pred_y, 'prediction number')
- print(test_y[:10].numpy(), 'real number')
NetYea 網頁設計 發表在 痞客邦 留言(0) 人氣()
ubuntu firefox播放久了,突然不能用了
顯示
ubuntu firefox youtube cannot play


安裝插件
NetYea 網頁設計 發表在 痞客邦 留言(0) 人氣()
結果圖:

座標:
- [[ 16 290]
- [412 491]
- [740 626]
- [283 631]
- [146 651]
- [ 32 710]]
- 5.0
- image 1/1 D:\yolo\bus.jpg: 640x480 4 persons, 1 bus, 1 stop sign, 83.9ms
- Speed: 3.0ms preprocess, 83.9ms inference, 4.0ms postprocess per image at shape (1, 3, 640, 480)
- tensor([[ 22.3412, 228.0822, 802.0841, 754.3939]], device='cuda:0')
- 準確率 0.879738450050354
- x,y: [[412 491]]
- 0.0
- tensor([[ 47.5999, 398.8344, 244.2552, 903.1386]], device='cuda:0')
- 準確率 0.873720109462738
- x,y: [[146 651]]
- 0.0
- tensor([[670.3670, 376.9174, 810.0000, 875.0829]], device='cuda:0')
- 準確率 0.8693700432777405
- x,y: [[740 626]]
- 0.0
- tensor([[220.5713, 405.7240, 344.5589, 857.2506]], device='cuda:0')
- 準確率 0.819391667842865
- x,y: [[283 631]]
- 11.0
- tensor([[7.7698e-02, 2.5441e+02, 3.2119e+01, 3.2465e+02]], device='cuda:0')
- 準確率 0.44594067335128784
- x,y: [[ 16 290]]
- 0.0
- tensor([[3.2650e-02, 5.4988e+02, 6.4001e+01, 8.6930e+02]], device='cuda:0')
- 準確率 0.29976797103881836
- x,y: [[ 32 710]]
-
NetYea 網頁設計 發表在 痞客邦 留言(0) 人氣()


